
准备工作
需要Linux CentOS 7.x 两台及以上,本文用的 7.9。
Master最低配置2C2G
安装步骤多个节点可以并行操作,默认所有操作各节点都要执行,某些操作仅主/工作节点执行在标题中有标注(主/工)。
部署成功后可以尝试使用 Kubesphere 或 Rancher 容器管理平台进行管理。
安装步骤
设置主机名
单独为每个服务器设置主机名,格式为hostnamectl set-hostname hostname。一般主节点取名master,从节点取名node.
hostnamectl set-hostname k8s-master

hostnamectl set-hostname k8s-node1

hostnamectl set-hostname k8s-node2
配置系统环境
cat > /etc/hosts << EOF
192.168.137.11 k8s-master
192.168.137.12 k8s-node1
192.168.137.13 k8s-node2
EOF
systemctl stop firewalld
systemctl disable firewalld
sed -i 's/^SELINUX=.*/SELINUX=disabled/g' /etc/selinux/config
setenforce 0 # 临时禁用swap分区
swapoff -a
# 永久禁用swap分区
vi /etc/fstab
# 注释掉下面的设置
# /dev/mapper/centos-swap swap
# 之后需要重启服务器生效所有节点添加网桥过滤和地址转发功能:
cat > /etc/sysctl.d/kubernetes.conf << EOF
net.bridge.bridge-nf-call-ip6tables = 1
net.bridge.bridge-nf-call-iptables = 1
net.ipv4.ip_forward = 1
EOF

# 然后执行,生效
sysctl --system
所有节点安装 docker
yum -y install docker
systemctl enable --now docker
配置K8S yum 源
本次使用国内阿里云的 yum 源
$ cat > /etc/yum.repos.d/kubernetes.repo << EOF
[kubernetes]
name=Kubernetes
baseurl=https://mirrors.aliyun.com/kubernetes/yum/repos/kubernetes-el7-x86_64
enabled=1
gpgcheck=1
repo_gpgcheck=1
gpgkey=https://mirrors.aliyun.com/kubernetes/yum/doc/yum-key.gpg https://mirrors.aliyun.com/kubernetes/yum/doc/rpm-package-key.gpg
EOF
所有节点安装指定版本 kubeadm,kubelet 和 kubectl(我这里选择1.23.0版本的):
yum install -y kubelet-1.23.0 kubeadm-1.23.0 kubectl-1.23.0
# 设置kubelet开机启动(看你自己)
systemctl enable kubelet
执行结束即安装成功
systemctl daemon-reload
systemctl restart docker
systemctl restart kubelet部署Kubernetes集群(只需要在master节点上操作初始化命令)
1. 首先要覆盖kubeadm的镜像地址,因为这个是外网的无法访问,需要替换成国内的镜像地址,使用此命令列出集群在配置过程中需要哪些镜像:
kubeadm config images pull --image-repository registry.aliyuncs.com/google_containers2.然后将镜像手动拉取下来,这样在初始化的时候回更快一些(还有一个办法就是直接在docker上把镜像pull下来,docker只要配置一下国内源即可快速的将镜像pull下来)
初始化kubernetes(只需要在master节点上操作初始化命令)
初始化 Kubernetes,指定网络地址段 和 镜像地址(后续的子节点可以使用join命令进行动态的追加):
[root@k8s-master]# kubeadm init \
  --apiserver-advertise-address=192.168.137.11 \
  --image-repository registry.aliyuncs.com/google_containers \
  --kubernetes-version v1.23.0 \
  --service-cidr=10.96.0.0/12 \
  --pod-network-cidr=10.244.0.0/16 \
  --ignore-preflight-errors=all

# –apiserver-advertise-address # 集群通告地址(master 机器IP,这里用的万兆网)
# –image-repository # 由于默认拉取镜像地址k8s.gcr.io国内无法访问,这里指定阿里云镜像仓库地址
# –kubernetes-version #K8s版本,与上面安装的一致
# –service-cidr #集群内部虚拟网络,Pod统一访问入口,可以不用更改,直接用上面的参数
# –pod-network-cidr #Pod网络,与下面部署的CNI网络组件yaml中保持一致,可以不用更改,直接用上面的参数
执行完之后要手动执行一些参数(尤其是 加入集群的join命令 需要复制记录下载):
[addons] Applied essential addon: kube-proxy

Your Kubernetes control-plane has initialized successfully!

To start using your cluster, you need to run the following as a regular user:

  mkdir -p $HOME/.kube
  sudo cp -i /etc/kubernetes/admin.conf $HOME/.kube/config
  sudo chown $(id -u):$(id -g) $HOME/.kube/config

Alternatively, if you are the root user, you can run:

  export KUBECONFIG=/etc/kubernetes/admin.conf

You should now deploy a pod network to the cluster.
Run "kubectl apply -f [podnetwork].yaml" with one of the options listed at:
  https://kubernetes.io/docs/concepts/cluster-administration/addons/

Then you can join any number of worker nodes by running the following on each as root:

kubeadm join 192.168.137.11:6443 --token ochspx.15in9qkiu5z8tx2y \
        --discovery-token-ca-cert-hash sha256:1f31202107af96a07df9fd78c3aa9bb44fd40076ac123e8ff28d6ab691a02a31
执行参数:
[root@node1 home]# mkdir -p $HOME/.kube
[root@node1 home]# sudo cp -i /etc/kubernetes/admin.conf $HOME/.kube/config
[root@node1 home]# sudo chown $(id -u):$(id -g) $HOME/.kube/config
[root@node1 home]#
[root@node1 home]# vim /root/.bash_profile
加入以下这段:
# 超级用户变量
export KUBECONFIG=/etc/kubernetes/admin.conf
# 设置别名
alias k=kubectl
# 设置kubectl命令补齐功能
source <(kubectl completion bash)这段要复制记录下来(来自k8s初始化成功之后出现的join命令,需要先配置完Flannel才能加入子节点),后续子节点加入master节点需要执行这段命令:
kubeadm join 192.168.137.11:6443 --token ochspx.15in9qkiu5z8tx2y \
        --discovery-token-ca-cert-hash sha256:1f31202107af96a07df9fd78c3aa9bb44fd40076ac123e8ff28d6ab691a02a31
设定kubeletl网络(主节点部署)
部署容器网络,CNI网络插件(在Master上执行,著名的有flannel、calico、canal和kube-router等,简单易用的实现是为CoreOS提供的flannel项目),这里使用Flannel实现。
下载kube-flannel.yml:
[root@k8s-master]# wget 然后修改配置文件,找到如下位置,修改 Newwork 与执行 kubeadm init 输入的网段一致:
net-conf.json: |
  {
    "Network": "10.244.0.0/16",
    "Backend"": {
      "Type": "vxlan"
  }
}
修改配置之后安装组件(如果安装的时候卡在pull镜像的时候,试一试手动用docker将镜像拉取下来):
[root@node1 home]# kubectl apply -f kube-flannel.yml查看flannel pod状态(必须要为Running状态,如果kube-flannel起不来,那么就用kubectl describe pod kube-flannel-ds-f5jn6 -n kube-flannel命令查看pod起不来的原因,然后去搜度娘获取解决方案):
[root@k8s-master]# # 必须所有的容器都是Running
[root@k8s-master]# kubectl get pod --all-namespaces
NAMESPACE      NAME                                 READY   STATUS    RESTARTS   AGE
kube-flannel   kube-flannel-ds-f5jn6                1/1     Running   0          8m21s
kube-system    coredns-6d8c4cb4d-ctqw5              1/1     Running   0          42m
kube-system    coredns-6d8c4cb4d-n52fq              1/1     Running   0          42m
kube-system    etcd-k8s-master                      1/1     Running   0          42m
kube-system    kube-apiserver-k8s-master            1/1     Running   0          42m
kube-system    kube-controller-manager-k8s-master   1/1     Running   0          42m
kube-system    kube-proxy-swpkz                     1/1     Running   0          42m
kube-system    kube-scheduler-k8s-master            1/1     Running   0          42m
查看通信状态:
[root@k8s-master]# kubectl get pod -n kube-system
NAME                                 READY   STATUS    RESTARTS   AGE
coredns-6d8c4cb4d-ctqw5              1/1     Running   0          52m
coredns-6d8c4cb4d-n52fq              1/1     Running   0          52m
etcd-k8s-master                      1/1     Running   0          53m
kube-apiserver-k8s-master            1/1     Running   0          53m
kube-controller-manager-k8s-master   1/1     Running   0          53m
kube-proxy-swpkz                     1/1     Running   0          52m
kube-scheduler-k8s-master            1/1     Running   0          53m
[root@node1 home]#
[root@node1 home]# 获取主节点的状态
[root@node1 home]# kubectl get cs
Warning: v1 ComponentStatus is deprecated in v1.19+
NAME                 STATUS    MESSAGE                         ERROR
controller-manager   Healthy   ok
scheduler            Healthy   ok
etcd-0               Healthy   {"health":"true","reason":""}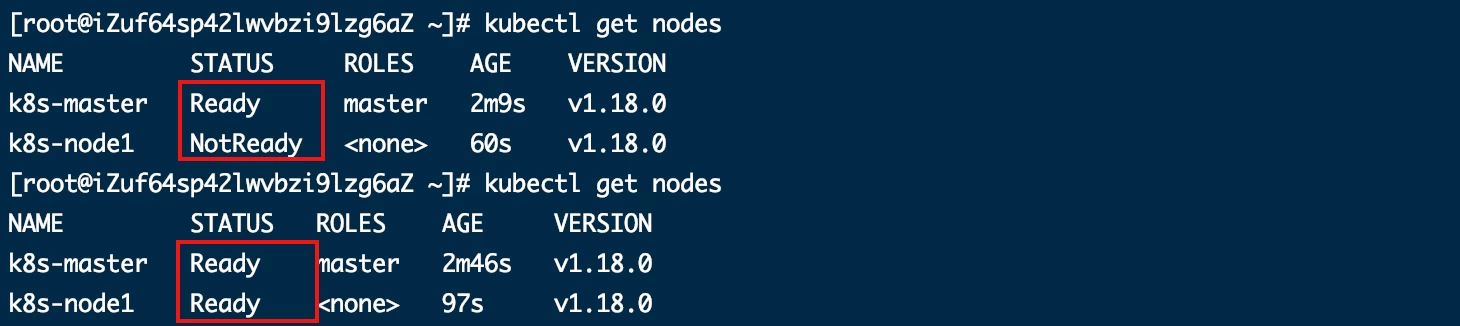
子节点加入集群(在子节点上操作)
初始化会生成join命令,需要在子节点执行即可,以下token作为举例,以实际为主,例如:
[root@node1]# kubeadm join 192.168.137.11:6443 --token ochspx.15in9qkiu5z8tx2y         --discovery-token-ca-cert-hash sha256:1f31202107af96a07df9fd78c3aa9bb44fd40076ac123e8ff28d6ab691a02a31
[preflight] Running pre-flight checks
[preflight] Reading configuration from the cluster...
[preflight] FYI: You can look at this config file with 'kubectl -n kube-system get cm kubeadm-config -o yaml'
[kubelet-start] Writing kubelet configuration to file "/var/lib/kubelet/config.yaml"
[kubelet-start] Writing kubelet environment file with flags to file "/var/lib/kubelet/kubeadm-flags.env"
[kubelet-start] Starting the kubelet
[kubelet-start] Waiting for the kubelet to perform the TLS Bootstrap...

This node has joined the cluster:
* Certificate signing request was sent to apiserver and a response was received.
* The Kubelet was informed of the new secure connection details.

Run 'kubectl get nodes' on the control-plane to see this node join the cluster.
默认的 join token 有效期限为24小时,当过期后该 token 就不能用了,这时需要重新创建 token,创建新的join token需要在主节点上创建,创建命令如下:
[root@k8s-master]# kubeadm token create --print-join-command加入之后再在主节点查看集群中节点的状态(必须要都为Ready状态):
[root@k8s-master]# kubectl get nodes
NAME         STATUS     ROLES                  AGE     VERSION
k8s-master   Ready      control-plane,master   63m     v1.23.0
k8s-node1    Ready      <none>                 3m57s   v1.23.0
k8s-node2 Ready <none> 29s v1.23.0如果所有的节点STATUS都为Ready的话,那么到此,所有的子节点加入完成!
1.3.5 删除子节点(在master主节点上操作)
# kubectl drain <node name> --delete-local-data --force --ignore-daemonsets
# 其中 <node name> 是在k8s集群中使用 <kubectl get nodes> 查询到的节点名称
[root@k8s-master]# kubectl drain k8s-node2 --delete-local-data --force --ignore-daemonsets
[root@k8s-master]# kubectl delete node k8s-node2
然后在删除的子节点上操作重置k8s(重置k8s会删除一些配置文件):
[root@k8s-node1]# # 子节点重置k8s
[root@k8s-node1]# kubeadm reset
[reset] WARNING: Changes made to this host by 'kubeadm init' or 'kubeadm join' will be reverted.
[reset] Are you sure you want to proceed? [y/N]: y
[preflight] Running pre-flight checks
W0425 01:59:40.412616   15604 removeetcdmember.go:80] [reset] No kubeadm config, using etcd pod spec to get data directory
[reset] No etcd config found. Assuming external etcd
[reset] Please, manually reset etcd to prevent further issues
[reset] Stopping the kubelet service
[reset] Unmounting mounted directories in "/var/lib/kubelet"
[reset] Deleting contents of config directories: [/etc/kubernetes/manifests /etc/kubernetes/pki]
[reset] Deleting files: [/etc/kubernetes/admin.conf /etc/kubernetes/kubelet.conf /etc/kubernetes/bootstrap-kubelet.conf /etc/kubernetes/controller-manager.conf /etc/kubernetes/scheduler.conf]
[reset] Deleting contents of stateful directories: [/var/lib/kubelet /var/lib/dockershim /var/run/kubernetes /var/lib/cni]

The reset process does not clean CNI configuration. To do so, you must remove /etc/cni/net.d

The reset process does not reset or clean up iptables rules or IPVS tables.
If you wish to reset iptables, you must do so manually by using the "iptables" command.

If your cluster was setup to utilize IPVS, run ipvsadm --clear (or similar)
to reset your system's IPVS tables.

The reset process does not clean your kubeconfig files and you must remove them manually.
Please, check the contents of the $HOME/.kube/config file.
然后在被删除的子节点上手动删除k8s配置文件、flannel网络配置文件 和 flannel网口:
[root@k8s-node1]# rm -rf /etc/cni/net.d/
[root@k8s-node1]# rm -rf /root/.kube/config
[root@k8s-node1]# # 删除cni网络
卸载脚本
# 首先清理运行到k8s群集中的pod,使用
kubectl delete node --all

# 使用脚本停止所有k8s服务
for service in kube-apiserver kube-controller-manager kubectl kubelet etcd kube-proxy kube-scheduler;
do
    systemctl stop $service
done

# 使用命令卸载k8s
kubeadm reset -f

# 卸载k8s相关程序
yum -y remove kube*

# 删除相关的配置文件
modprobe -r ipip
lsmod

# 然后手动删除配置文件和flannel网络配置和flannel网口:
rm -rf /etc/cni
rm -rf /root/.kube
# 删除cni网络
ifconfig cni0 down
ip link delete cni0
ifconfig flannel.1 down
ip link delete flannel.1

# 删除残留的配置文件
rm -rf ~/.kube/
rm -rf /etc/kubernetes/
rm -rf /etc/systemd/system/kubelet.service.d
rm -rf /etc/systemd/system/kubelet.service
rm -rf /etc/systemd/system/multi-user.target.wants/kubelet.service
rm -rf /var/lib/kubelet
rm -rf /usr/libexec/kubernetes/kubelet-plugins
rm -rf /usr/bin/kube*
rm -rf /opt/cni
rm -rf /var/lib/etcd
rm -rf /var/etcd

# 更新镜像
yum clean all
yum makecache